Basic Arduino Robotics for Starters: Your First Steps Toward Moving Machines

Selected theme: Basic Arduino Robotics for Starters. Welcome to a friendly launchpad where tiny boards spark big ideas. We’ll turn blinking LEDs into rolling wheels, celebrate small wins, and build confidence through playful, practical projects. Join our journey, ask questions, and subscribe to keep your beginner momentum going strong.

What Arduino Robotics Is and Why Beginners Thrive Here

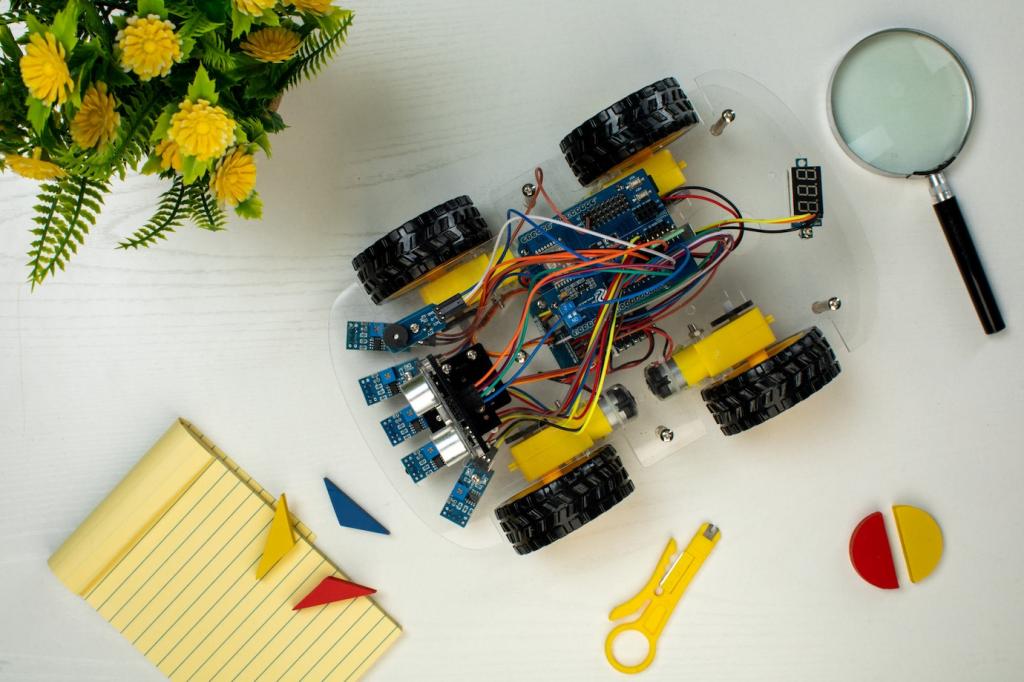
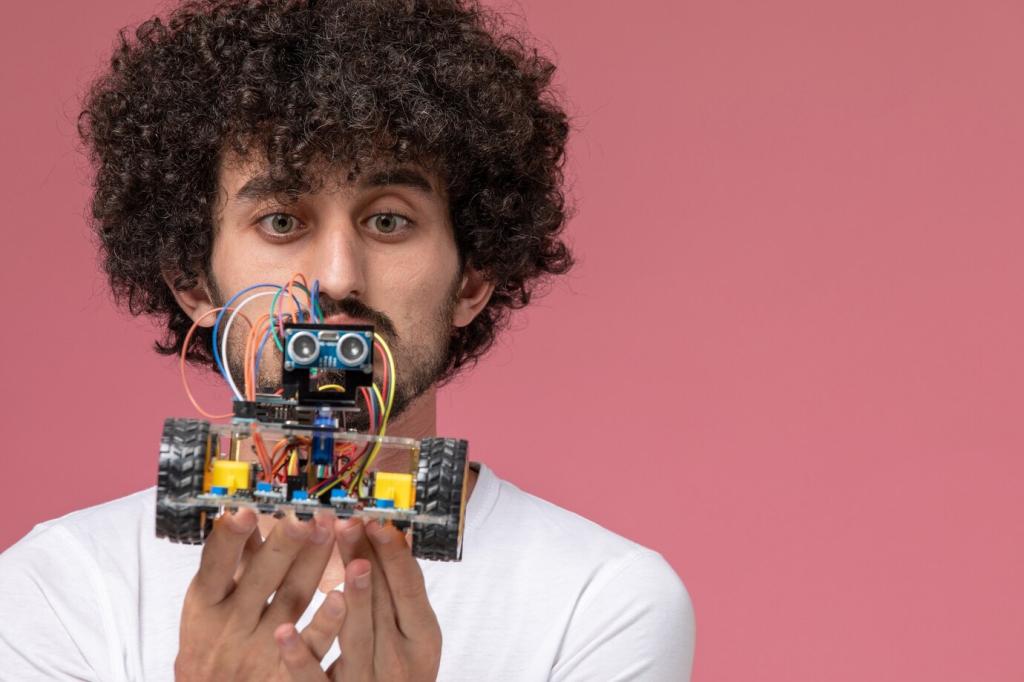
Arduino is a tiny, open‑source microcontroller board that reads sensor signals and controls motors with code you write. It’s affordable, forgiving, and backed by a massive community. For starters, that means quick progress, fewer roadblocks, and a friendly place to ask for help and celebrate breakthroughs together.

What Arduino Robotics Is and Why Beginners Thrive Here

Robotics fuses coding, electronics, and mechanics into hands‑on feedback you can see and hear. When your code makes wheels spin or sensors react, concepts click faster. That immediate cause‑and‑effect turns abstract lessons into memorable experiments. Tell us your first robot idea below and we’ll cheer you on.
Brain, Shield, and Power
Start with an Arduino Uno or Nano, a compact motor driver like TB6612FNG or L298N, and a dependable power solution. A AA battery pack or a small LiPo with a proper regulator keeps things safe and steady. Use a barrel jack or screw terminals, and always double‑check polarity before flipping the switch.
Wheels, Motors, and Chassis
Two TT gear motors, a simple acrylic chassis, and a caster wheel create a sturdy rolling base. Rubber tires improve traction, while brass standoffs tame messy wiring. Keep a small screwdriver set and zip ties handy. Post your chosen chassis in the comments and we’ll suggest tidy mounting tricks beginners love.
Sensors You’ll Actually Use
Begin with IR line sensors for track following, an HC‑SR04 ultrasonic sensor for distance, and simple bump switches for reliability. Add a photoresistor for light experiments. These parts are inexpensive, forgiving, and easy to wire. Tell us which sensor excites you most, and we’ll recommend a starter activity today.

Programming Fundamentals That Move Wheels

delay() freezes your robot’s brain, but millis() enables smooth multitasking. Track elapsed time for sensor reads, motor updates, and LED cues without stopping everything. This shift feels magical the first time your robot follows a line and blinks status lights simultaneously. Try it today and report your results.

Programming Fundamentals That Move Wheels

Break code into small, clear functions like readLine(), setSpeed(), and logValues(). Descriptive names guide you when bugs appear and make sharing code easier. Keep files tidy, comment intentions, and refactor early. Want a template? Ask below, and subscribe to receive our lightweight starter architecture by email.

Programming Fundamentals That Move Wheels

Real sensors are noisy, so average multiple samples, clamp extremes, and calibrate against your actual floor and tape. Store min‑max values at startup and map readings accordingly. Keep a notebook of lighting conditions. Share your calibration trick in the comments and inspire other first‑time builders today.

Troubleshooting Tales: Real Lessons from Beginners

A beginner’s robot crawled slowly despite perfect code. Fresh batteries measured fine at rest, but voltage sagged under load. The fix was simple: better cells, thicker wires, and checking voltage while the motors spun. Measure under load next time, and tell us if this story saved your Saturday.

Troubleshooting Tales: Real Lessons from Beginners

Wheels spun opposite directions because the motor leads were swapped. The robot zigged when it should zag. Reversing one motor’s leads and updating direction pins fixed everything. Label wires, test one motor at a time, and save your sanity. Share your biggest wiring oops so others can avoid it.

Troubleshooting Tales: Real Lessons from Beginners

A board kept popping loose before a school demo. Electrical tape and two zip ties stabilized the mount, and the robot finished its route proudly. Quick fixes aren’t elegant, but they keep momentum. What emergency hack rescued your project? Add it below, and subscribe for our field‑ready checklist.

Community, Safety, and Next Steps

Join a local makerspace, a school club, or an online Arduino forum. Follow open‑source projects and learn by remixing. Friendly peers shorten learning curves and amplify joy. Comment with your city or favorite community, and we’ll help connect you with other budding builders nearby.
Teaching cements knowledge. Show a friend how to read a sensor or mount a motor. Record a two‑minute tip for your class. You’ll spot gaps, gain clarity, and boost confidence. Share your micro‑lesson idea here, and subscribe to get our starter workshop outline this week.
Pick one robot, one feature, and one demo date. Print a tiny calendar, plan ten tiny steps, and reward progress weekly. By day thirty, you’ll be demo‑ready. Post your pledge, ask for accountability buddies, and check in on Fridays. We’ll cheer loudly and share your milestone story.
Viatechis
Privacy Overview

This website uses cookies so that we can provide you with the best user experience possible. Cookie information is stored in your browser and performs functions such as recognising you when you return to our website and helping our team to understand which sections of the website you find most interesting and useful.